Step-by-Step Guide: Creating Pipelines
Pipelines play a crucial role in automating and streamlining business processes in GrowthFlow. Whether you're managing leads, nurturing prospects, or closing deals, creating pipelines can significantly enhance your efficiency and effectiveness. In this step-by-step guide, we'll walk you through the process of creating pipelines in GrowthFlow.
Step 1: Accessing the Pipelines Section
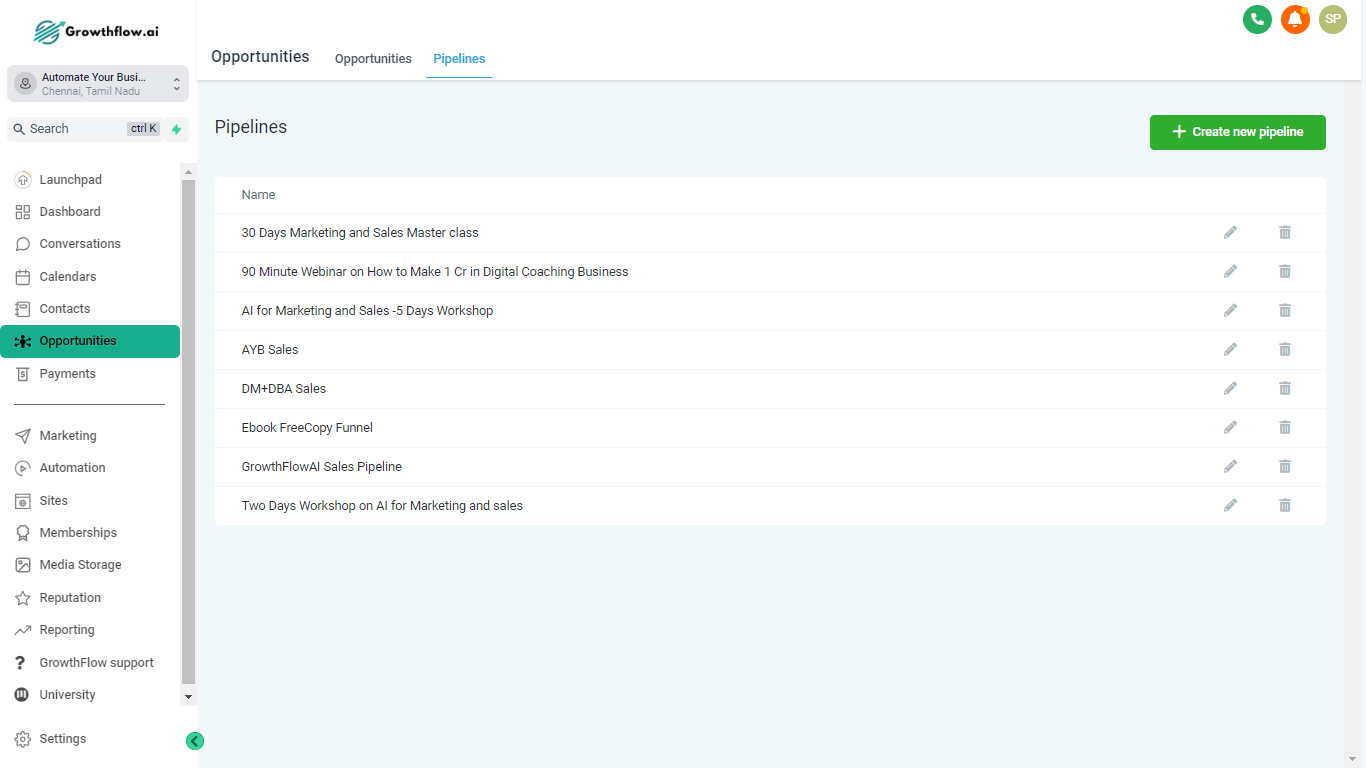
Go to your Subaccount
Go to Opportunities from the left sidebar
Select Pipelines from the top menu

Step 2: Creating a new Pipeline
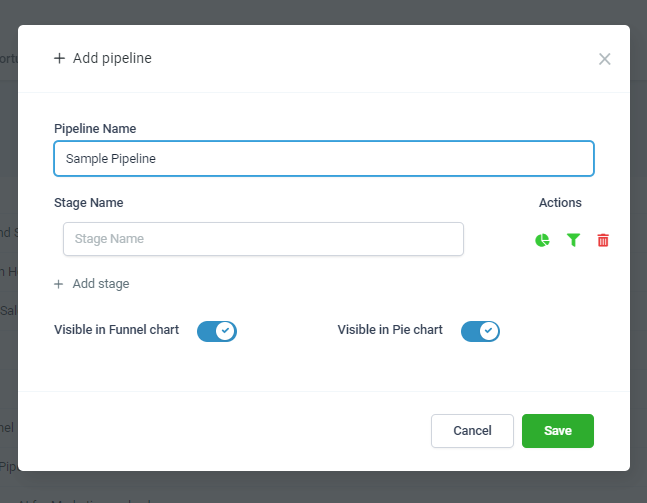
Once you're in the Pipelines section, click on the "Create Pipeline" button.
Give your pipeline a descriptive name that reflects its purpose or the stage of the customer journey it represents.

Pipeline names always need to be unique and adding or updating another pipeline with an identical name is not allowed.
Step 3: Adding Stages to Your Pipeline
With your new pipeline created, you'll see an empty canvas where you can add stages.
Enter the name of the first stage of your pipeline
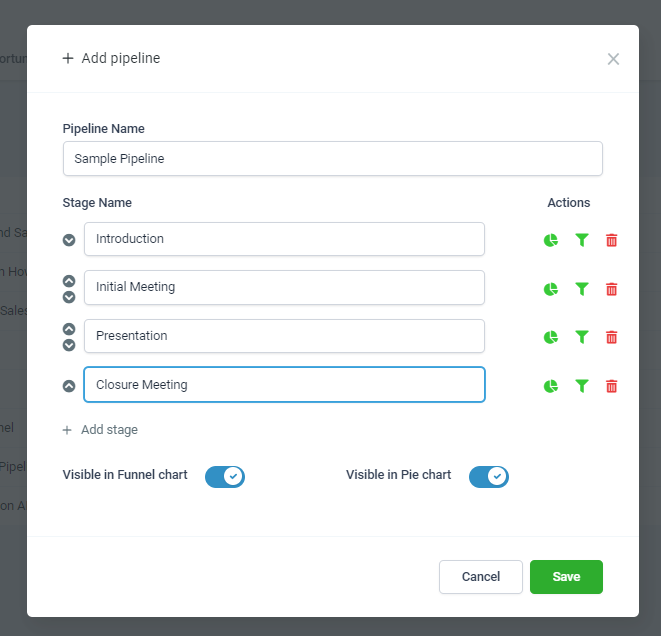
Click on the "Add Stage" button to create more stages
Repeat this process to add additional stages, defining the sequential flow of your pipeline.
You can also reorder the different pipeline stages using the up and down arrows on the left of the stage name.
Note that you need not create stages for "Won" or "Lost". GrowthFlow creates those stages for every pipeline of yours by default.

Stage names always need to be unique and adding or updating another stage with an identical name is not allowed.Step 4: Pipeline Actions and Dashboard configuration
The funnel and pie chart options allow you to decide whether the pipeline should be shown in the dashboard or not
You can also configure whether or not to show each stage in the dashboard funnel and pie charts by clicking on their icons at the right of the respective stage.
Learn more about dashboards for opportunities here.
